
To generate content for Trainz, you need a 3D modelling program. The traditional programs used for this modelling are 3DS Max (a commercial program that costs serious money), Gmax (a freeware cut down version of 3DS Max that is rather buggy and no longer supported), or Blender (another freeware program with a rather incomprehensible user interface). Personally I use Gmax and put up with it's foibles, I've tried Blender, but other than simple import and export, I can't make it do a thing.
If you wish to use the Gmax 3D modelling program to generate your Trainz content, there are certain steps that need to be followed if it is to work correctly. This tutorial should enable you to get up and running with a minimum of head scratching.
Firstly you will need to download Gmax itself. The current version is
V1.2, and it isn't likely to be updated. There are older versions
floating about the internet, but I would strongly advise against their
use. The company now owning Gmax is called Turbosquid, and the download
is available here :
This will bring up the main Gmax download page which has a large
number of clickable things to download. The main one you want is
where it says "Gmax 19.2Mb" and has a big green box saying "Free Download".
Clicking that should download a file "gmax12.exe", which you should
save on your PC. While you are on this webpage you should also
download the files "gmax12_help.exe", "gmax12_tutorials.exe",
"library.exe" and "tempestinstall.exe".

Next we need to install the main Gmax software - run the file
"gmax12.exe" from wherever you saved it. When you run it, you will
probably get a security warning
from Windows - nothing to worry about, just allow it to run, then click
Setup.


You get the usual message about closing all other programs, just
click next, and then you must "Accept" the license agreement, and click
Next again.


You will now be asked where to put Gmax. In Windows XP it
would go under "Program Files", but with later versions of Windows this
is a protected directory, so the default "C:\gmax" may be a better
option. Just browse to where you want it, then click next again.


To complete the installation, just click Next, and then finally Finish.


That's Gmax itself installed, now we need to install the help,
tutorials and the libraries - you will need these for certain ! Run the
file "gmax12_help.exe". This will give a dialogue box asking where to unzip the help files to. You need to click "Browse"
and point it to the location where you installed Gmax earlier. Having
set up the location, you can then click "Unzip", and finally "Close"
after it has finished.


This process must then be repeated for the files
"gmax12_tutorials.exe" and for "library.exe". Thats it, Gmax is now
installed. Now we must install the exporter so that Gmax can produce
the correct files for use in Trainz.
Gmax requires a seperate exporter to write files that can be used by Trainz. Get it from the following link :
This will download a file "Trainz_Asset_Creation_Studio.zip" which
you should save on your PC. You will now need to unzip the archive
which should produce 2 files - "Auran Trainz GMAX Gamepack.exe" and
"Trainz Studio Readme.txt". The readme file refers to older versions of
Gmax (V1.0 and V1.1) and is best ignored. You need to run the ".exe"
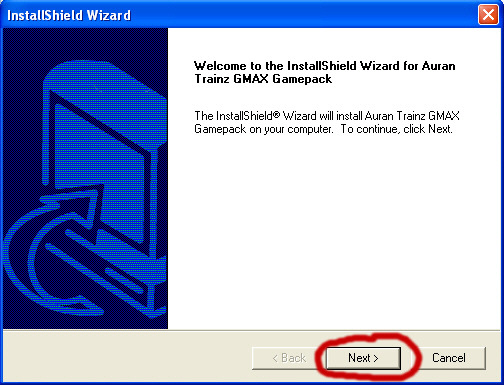
file to install the exporters. No selections or anything needed, just keep clicking "Next".


Now we are ready to run up Gmax for the first time. The installation
so far will have installed two icons on your desktop, one for Gmax
itself, and one for the Trainz Asset Creation Studio. The latter one
can be safely deleted. It will run up Gmax, but with a non-standard
interface which I would not recomend, particularly if you are planning
to follow tutorials. Just run it from the standard Gmax icon. Gmax will
then come up with a Welcome to Gmax screen and requires you to enter a
registration code. You need to click on the "Goto" box, and your web
browser should then open and display TurboSquid's Gmax registration
page.

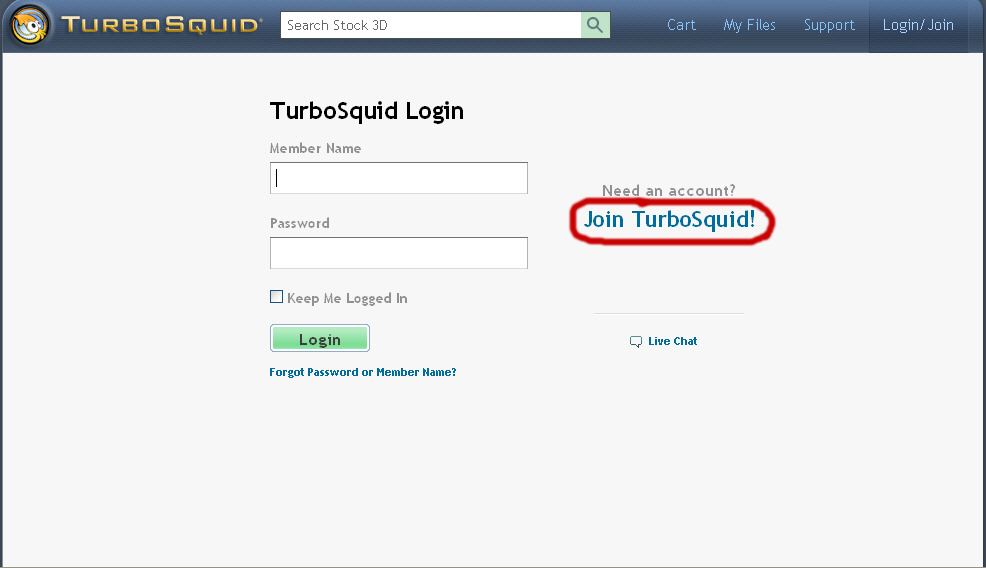
Click on the link shown to be taken to the login page

You probably don't have a TurboSquid account, so the first step is to click where shown to sign up for an account.
Enter your details in the appropriate boxes, and then click "Create
Account". If succesfull, they will send you an email welcoming you to
TurboSquid, and they will send you the occasional newsletter (only a
couple of times a year - it's no big deal).

I'm not sure whether you are now logged in automatically, or whether
you have to now login, but either way you should end up at the
"Register Gmax" webpage shown. Fill in all your details and click
"Submit". You should then be sent an email giving you a "Registered
User Identification Code". Copy and paste it into the box in the
"Welcome to Gmax" screen. If you got it correct a green tick should
appear, and you will be able to click "Continue" to start Gmax.

If you ever need to reinstall Gmax, your registration
code should
be still in the registry, so you won't be asked for it again. If
however your registry gets trashed by some evil virus or whatever, then
it will ask you to re-enter your RUIC. In this case if you still have
the email giving your RUIC, then rather than re-register with
TurboSquid, you can
set the date and time to when you got your RUIC email, and then it will
accept your original RUIC. (Don't forget to change the time and date
back afterwards).
Gmax will now ask you which set of video drivers it should use. The
default (and the slowest) is Heidi, and this is the most compatible
option. If your graphics card can handle OpenGL or DirectX, then you
can try these options for more performance (even my netbook can handle OpenGL well enough to run Gmax).

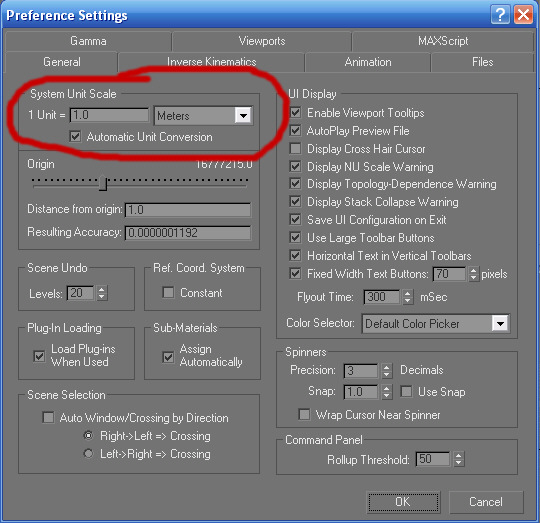
Now we are actually in Gmax we need to check a few of the settings. Click the dropdown menu Customize\Preferences.

The 'General' tab should be displayed, if not, click it. The most important thing here as shown is the System Unit Scale. This MUST
be set to metres. If you don't do this, then your animations will not
work in Trainz. You can still use imperial measurements (feet and
inches) in your model, but the default system measurement must be
metres.
Next click on the "Files" tab. This should be as shown. The
important one here is "Increment on Save", so each time you save a
model, the old version does not get erased, but a new file is saved
with a number suffix, so you would have FILE, FILE001, FILE002 etc.
This is vitally important, as Gmax has a nasty habit of crashing when
saving files and corrupting them, and if you only have the one version
..... The other thing to note here is the Auto Backup section. By
default this will automatically backup your work every 5 minutes. This
may seem like a good thing, but each time a backup is performed, the
Undo list is cleared which can be a royal pain. Also the Auto Backup
files have for some strange reason a ".gx" extension rather than a
".gmax" extension, so File\Open will not find them even if you navigate
to the "gmax\autoback" directory unless you change the "Files of Type"
(at the bottom of the Open dialogue) to "All Files". Your choice as to whether to have this enabled or not.

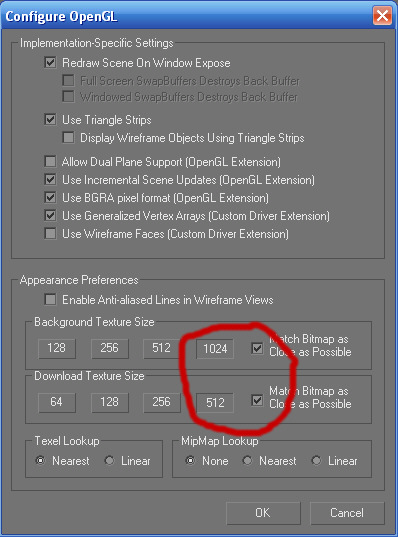
And finally in the Preference Settings we need the "Viewports" tab, and click on "Configure Driver"
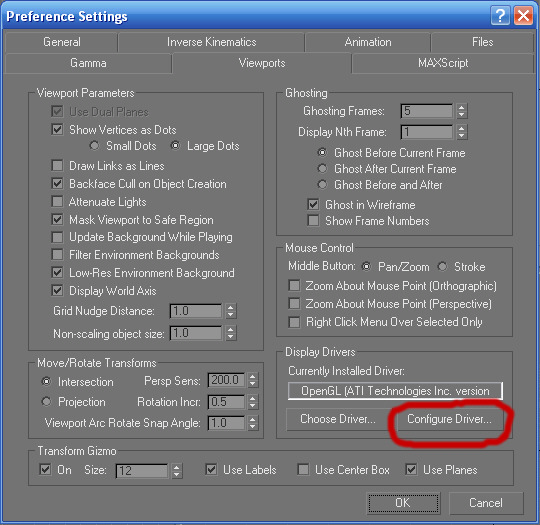
This will bring up the "Configure Driver" dialogue, and you need to
make sure that the texture size preferences are set to the highest
settings. If you don't do this your models will look very blurred
whilst in Gmax.
That's it really, your Gmax is now set up and ready to use. I will
make a couple of recomendations now to make Gmax easier to use.
Firstly the lower right window (or more correctly viewport) is by default "perspective". I have never found this very useful, as when you try to zoom in, parts of your model disappear. A much better use for this viewport is "user". To get this click anywhere in the perspective viewport and press "F" to make it a front view, then whilst pressing the ALT key on the keyboard, press the centre mouse button and drag the cursor around the viewport and use the scrollwheel to zoom in until you get a suitable view.
Secondly you may wish to zoom in a little in the other viewports, as
the default view seems to be set for designing football stadiums or the
like, and locos, wagons and such will just be a very small blob in the
centre of the view. Try drawing a small box or something about 1m
square, and zoom to get a good view of it.
Thirdly, with the "user" viewport selected (click in it to select, if it isn't already), select Customize\Viewport Configuration and tick the "Shade selected faces" option. This does what it says on the tin, and highlights in red the selected portion when you select part of an object.

When you are happy with your settings, select File\Save, and save with the filename "gmaxstart.gmax" in the "scenes" directory. Note that the dialogue box that comes up is titled "Save File As" because your file doesn't have a name until you save it. Gmax will then automatically load this file to set up your default settings each time it is initialised.


That's it. Now dig out some tutorials and give it a go. Don't expect
to be able to create something complicated like a steam engine at first
- try something simple like a sign. Good luck.
Page updated : 19 Dec 2015